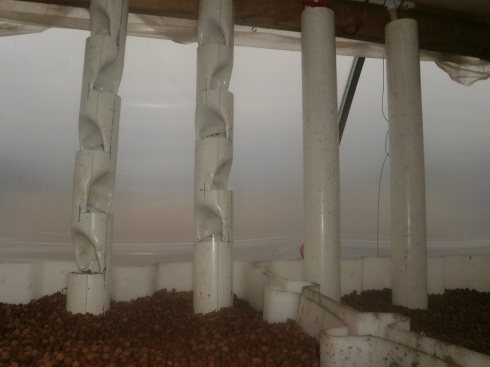
One of the things I changed from the old system was the water entry method. Before, water came up into the grow beds via two separate pumps which had hoses buried directly into the grow medium. Now, 4 vertical towers have been added; converting the system into a top feed system. Once completed, this will allow us to grow 20 more plants without taking up any extra horizontal space in the hoop house. These designs were taken from Murray Hallam’s idea for DIY strawberry towers, although we plan on growing much more than just strawberries in these towers… Furthermore, the system can be expanded quite a bit by adding even more towers. The sump pump we use has more than enough power to handle these 4 towers, so the addition of more towers would likely not present a problem. The top feed system is composed of a horizontal 3/4″ pvc pipe with 4 downward facing outlets. I installed a ball valve just prior to the horizontal pipe and above the first 3 outlets, leaving the last outlet open. These valves allow the flow rate to be controlled to adjust the rate in which the grow bed fills.
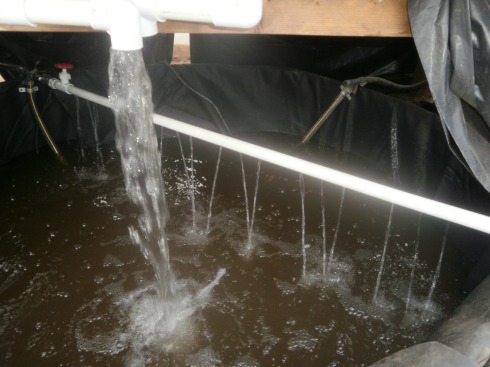
Another improvement to the old system is aeration method. Before, the pumps had a t-nozzle spraying half of the water directly into the fish tank and the other half was pumped upwards into the grow bed. Because of the way our system used to drain, the pumps couldn’t be left on all the time, and so water was not constantly being aerated. Unfortunately, this led to many fish deaths over the course of the year. Now, we have just one pump which is on 24 hours a day. The pump diverts more than half of the water into a 3/4″ pvc pipe/aeration tube that spans the length of the fish tank. Holes were drilled at regular intervals to allow water to spray downwards into the tank, aerating the water all of the time. As you can see in the photo, we have installed a ball valve just prior to the aeration tube to control flow rate.
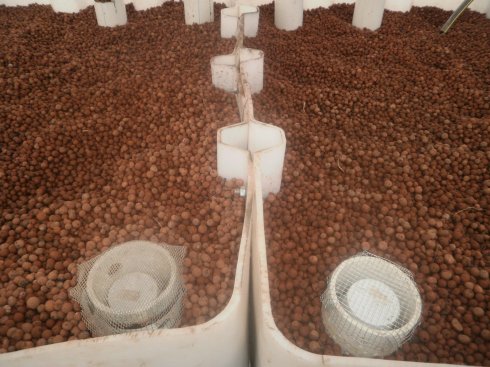
Two bell siphons were installed in each grow bed to facilitate drainage. To build the bell siphons, I referred to a document from the University of Hawaii that can be found here – Construction of Automatic Bell Siphons… I followed these instructions with only a few minor changes. In general, I used the “double-double” rule of bell siphons which refers to the 3 different pipe diameters being double one another’s length in succession. And so, the bell siphons were constructed using 4″ pvc tubing as a gravel guard to protect the inner siphon which was constructed from 2″ pvc. The inner stand pipe was made from 1″ pvc. So thats 4″-2″-1″. The siphons drain the water from the grow bed to achieve a slow fill/rapid drain type of system. I did notice that on the U of Hawaii instructions that inserting the snorkel straight into the bell siphon doesn't work very well because it causes a considerable kink in the line where the snorkel and siphon meet. So I went ahead and drilled my insertion holes at a 45 degree angle sloping downward. This relieved the kink and allowed the siphon to function properly.


You need to be a member of Aquaponic Gardening to add comments!
Join Aquaponic Gardening